The Repetier-Host program ships with the 3D print head attachment and is used in conjunction with a slicing software that is built into it to prepare 3D models for printing. If you have drawn a 3D model yourself or downloaded one from online (http://www.thingiverse.com or various other sources) you will notice it is an STL file. Repetier-Host will load the model into a graphical work space in which you’ll be able to move and rotate the piece if needed.
Here is the main screen zoomed out, the black dot is the zero point for the project. So when an object is placed you’ll want to place it close to this point.
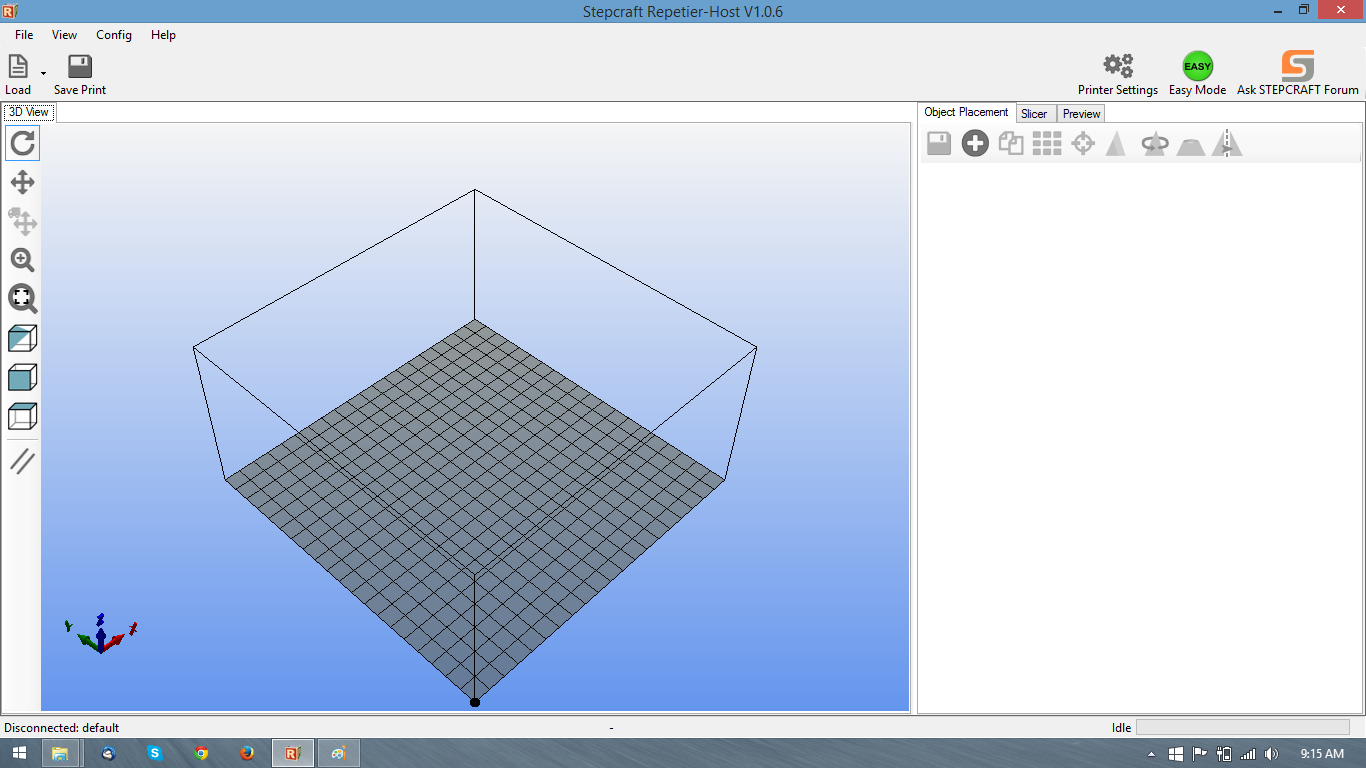
Click on the load icon near the top left corner of the screen. You can now choose which 3D model you would like to load into the work space.
By default the object is placed in the center of the work space.
To move the piece I can click on the Move Object button which shows four arrows with a small truck and then click and drag the object to where I want it closer to that black dot.
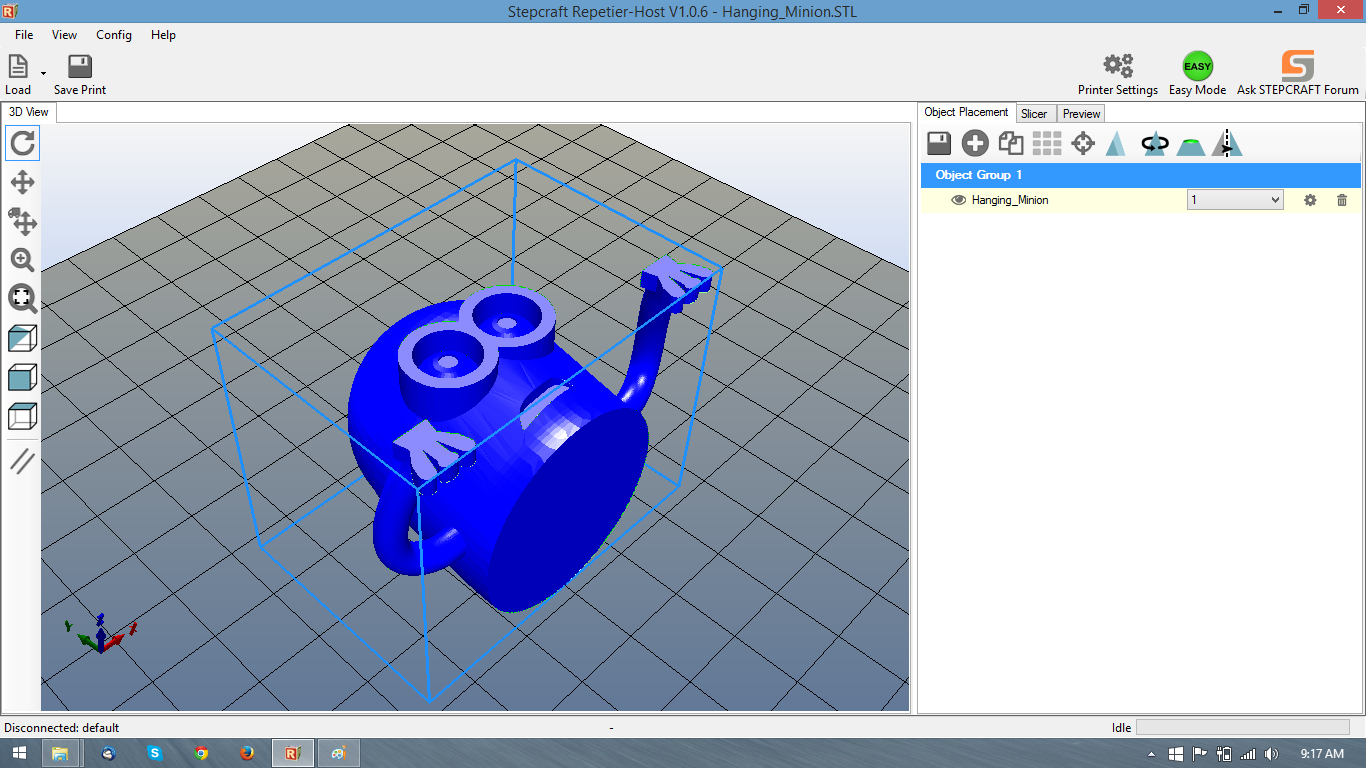
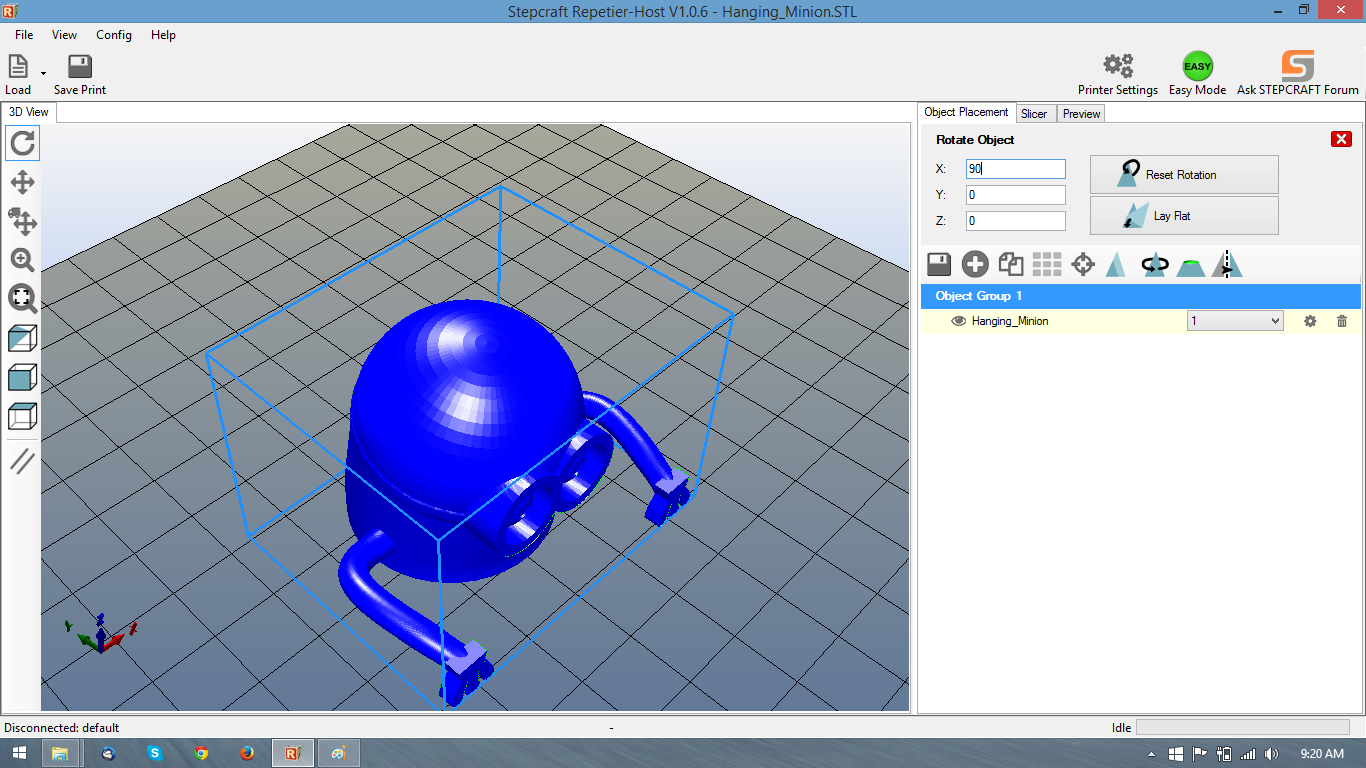
In the case of this model, I also need to rotate it to help make it print easier, the way it imported would make for a difficult if not impossible print. Since the first layers and only adhesion to the bed would be a small section of the cylindrical base. So I am going to click on “Rotate Object” towards the right hand side of the screen. This will give me choices for which values I want to rotate. In this case I am rotating the X value 90 degrees. Now standing up it will be easier to print, the only overhang will be around the eyes and arms instead of nearly the whole model.
Now I am going to click on the “Slicer” tab on the right hand side of the screen. When his comes up you can slice the model by hitting the “Slice with slic3r” button or configure the slicing, filament, and machine settings before hand. Clicking on configuration will bring of the settings.

In the configuration screen there are three main section, Print Settings, Filament Settings, and Printer Settings. You will generally be in the Print settings the most of the time adapting print settings for the different work you may be doing. Filament settings will allow you to adjust the extrusion rate and the true thickness of your 1.75mm PLA. Printer settings will allow you to change settings of the work space and parameters of the the g-code exportation.

Layers and perimeters will be one of the two sections you’ll be in most. You can change the layer height (up to the diameter of the nozzle) and the first layer height which to provide a good base you want to be at least .3mm. Running a smaller layer height will provide a more precise print but will take longer to complete. Perimeters are the outside layers or outline of the part. You want two perimeters at a minimum. If for example you are creating a hollow part you may want more perimeters. Solid layers will be how many layers at the top and bottom of the part will be solid faces. Making a part to pass through you would change these to zero.

The Infill settings determine how much of the inner section of the model will be filled in. You may need a solid part so you would choose 100% infill. But generally you would be choosing 30% and less. The pattern can be changed as well. If you are printing a model found online sometimes the creator will specify the amount of the infill needed. The material you use may allow you to change the infill amount as well.
Once you have settings chosen, click the save icon and then close the configuration page. You will be ready to slice the model now. Click the “Slice with Slic3r” button and the program will create the layers and g-code.

The completed slice will give you a print estimate time, filament needed, and total layers. On this screen too you can view individual layers to make sure things appear as they should. You will be able to see the infill amount and get a feel if you need more or less.
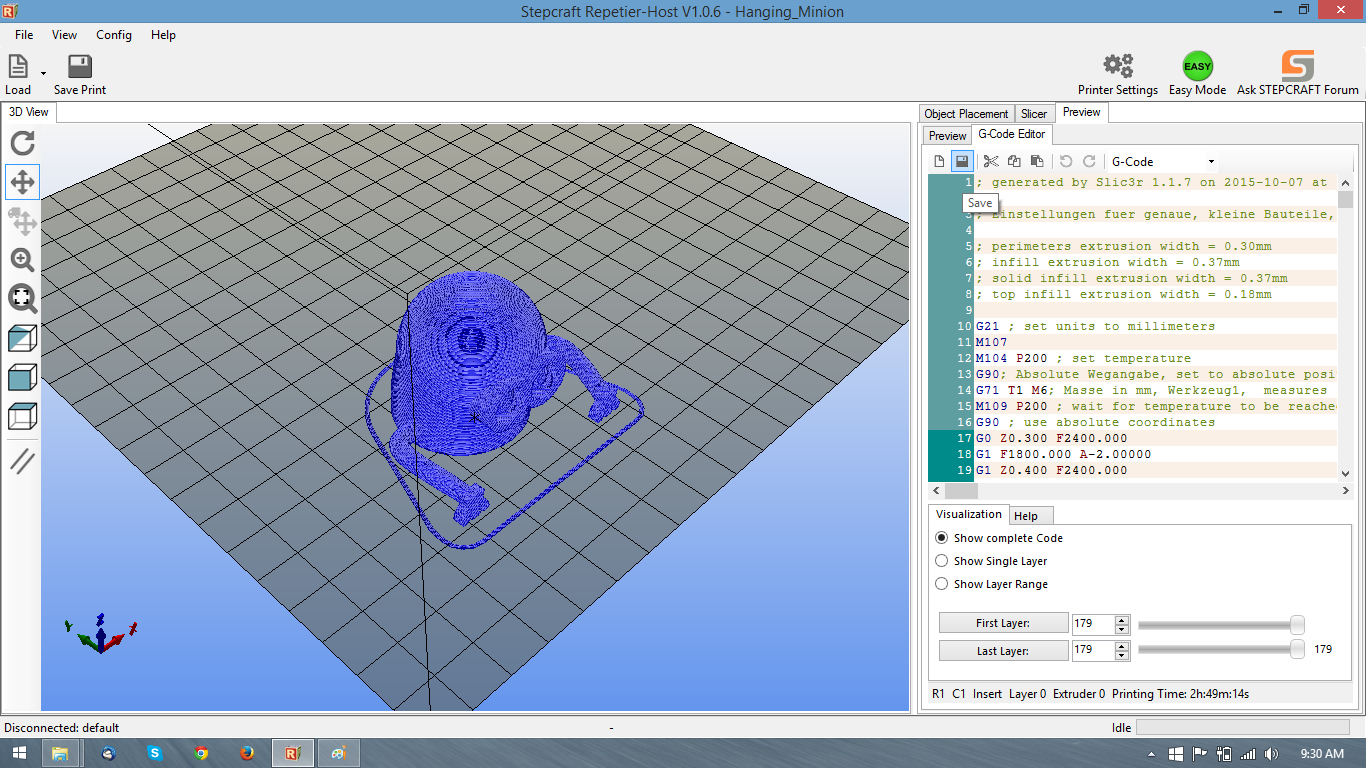
Click over to G Code Editor and near the top will be a save icon to save the project to a g-code file ready for UCCNC. Remember to open UCCNC under the profile link for “…_3D printer”, load the file, extrude some material via the A+ (up to 20% jog speed) until an even extrusion is coming out and then you’ll be ready to start printing.
Look for a full video coming soon.
Leave A Comment